Creating Text-Based PDFs
What is a high-quality scanned PDF?
- The text is not cut off.
- The pages are straight, not crooked or curved.
- No shadows are covering the print.
- Handwriting, highlighting, annotations, circles, or underlining is limited and do not cover any text.
- There is good color contrast throughout the page.
- The scan is clear with no blurry text.
- The text is highlightable indicating that it is text based.
Tips & Tricks
- When scanning a book with a spine, push the spine of the book down while scanning to ensure the text will copy clearly.
- Consider using an overhead scanner for higher quality files. An overhead scanner is available in Tutt Library.
- Scan one page at a time, and do not combine pages. This improves reading on mobile platforms and speeds up the conversion process for optical character recognition (OCR) software.
- Avoid scanned documents that need to be rotated when viewed on a screen.
- Document names should correspond to how documents are named on the syllabus and in Canvas.
- Avoid rescanning old documents, as the quality will deteriorate with each scan. Use the original source when possible.
Instructions for Scanning
HP brand machines on campus have the option to scan to OCR. To do so, follow either of these two methods:
- “Quick Scan” with Papercut Hive
- Enter your Papercut Hive access code
- Click “quick scan”
- Automatically scans as an OCR document
OR
- Scanning to email
- Select “Scan” > “Scan to Email”
- Enable OCR under “Options” > “File Type & Resolution.” Under “File Type” select “Searchable PDF (OCR)”
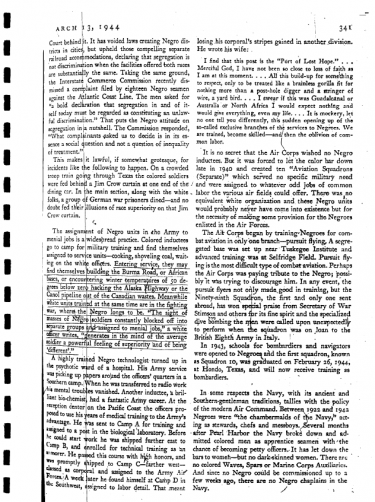
Example of a high-quality scan (Click to view full OCR document): 
Additional information about text-based documents and text-to-speech can be found on the assistive technology page.
|
The text is faded and the contrast is very light in both examples. |
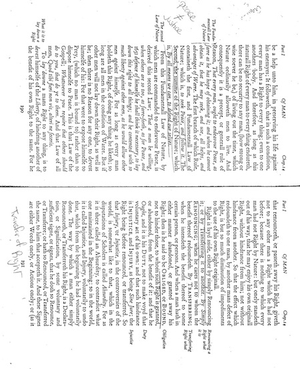
This scan has a darkened margin and shadows the text making it illegible. |
|
Part of a cut-off page has been included in the scan which can slow down the conversion process. |
The page is crooked. |
|
There is too much underlining and it goes over some of the text. |
The scan has heavy annotations, is 2 side-by-side pages, and is rotated.
|

show all / hide all