Office of Information Technology
Managing Zoom Recordings
Zoom.us offers two different options to record your zoom meetings; each with advantages and disadvantages. You can record to your computer or to the Zoom.us cloud.
All instructions on this page are subject to change based on Zoom and Microsoft products. If you find errors, please notify the Solutions Center with a link to this page and the text or image that didn't work.
General notes on recording
- Zoom cloud recordings will be automatically deleted from the cloud 120 days after they were recorded
- Recordings that have been deleted will be available in the Zoom recording trash and can be recovered for 30 days after the deletion.
- If you record to the cloud and you'll need the recording in the future, please download the recording and save it to your computer, your OneDrive, or MS Stream
- If you record to your computer, your Zoom meeting audio won't be transcribed
- All Zoom recordings are only processed after the Zoom meeting ends
- If you record to your computer, you'll need to keep your computer on for the processing to complete
- If you record to the cloud, the meeting's original host will receive an email
Recording to the cloud
- Start your Zoom meeting as usual - be sure you sign in to the Zoom app with SSO.
- Click the record button at the bottom of your Zoom window.
- The first time you record, you'll be asked if you want to "Record on this computer" or "Record to the cloud"; click "Record to cloud"
- When done, click the stop button or end your meeting.
- Your Zoom recording will usually finish processing at twice the meeting length after the end of the meeting, though it can take longer - up to 72 hours, depending on Zoom's current recording load.
- If your meeting lasted 30 minutes, it will likely take 60 minutes to process after the meeting has ended.
- You will receive an email when the recording is done processing
Recording to your computer
- Start your Zoom meeting as usual - be sure you sign in to the Zoom app with SSO.
- Click the record button at the bottom of your Zoom window.
- The first time you record, you'll be asked if you want to "Record on this computer" or "Record to the cloud"; click "Record on this computer"
- When done, click the stop button or end your meeting.
- The Zoom app dashboard needs to remain open for your recording to finish processing; it will finish depending on how fast your computer is, how many things you have running on your computer, and how long your meeting was.
- The Zoom app will notify you when the processing is finished.
Downloading & managing recordings from the cloud
- Log in to Zoom via SSO
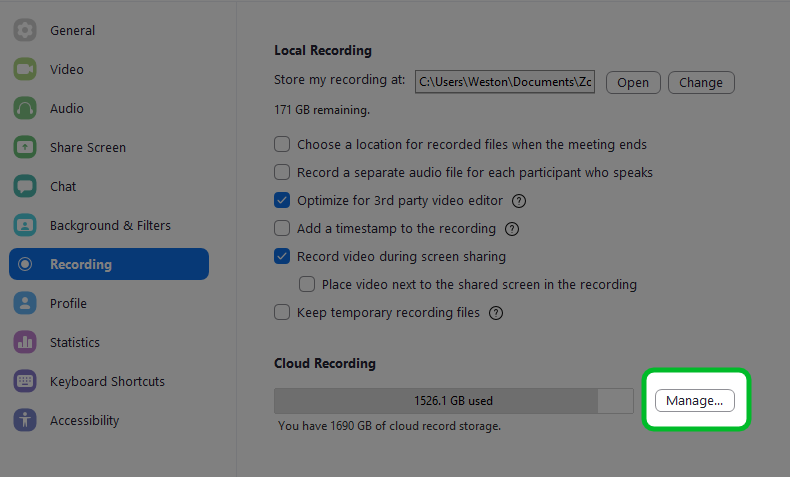
- Click the Recordings "tab" on your Zoom account web dashboard (alternatively click the "Manage..." button in your Zoom app recording settings)
- Click the More button on the right side of your recording, then click download to download your recording files. (Pro tip - temporarily set your browser's download folder to a folder in your OneDrive to save the videos directly into your OneDrive. Don't forget to change it back when done!)
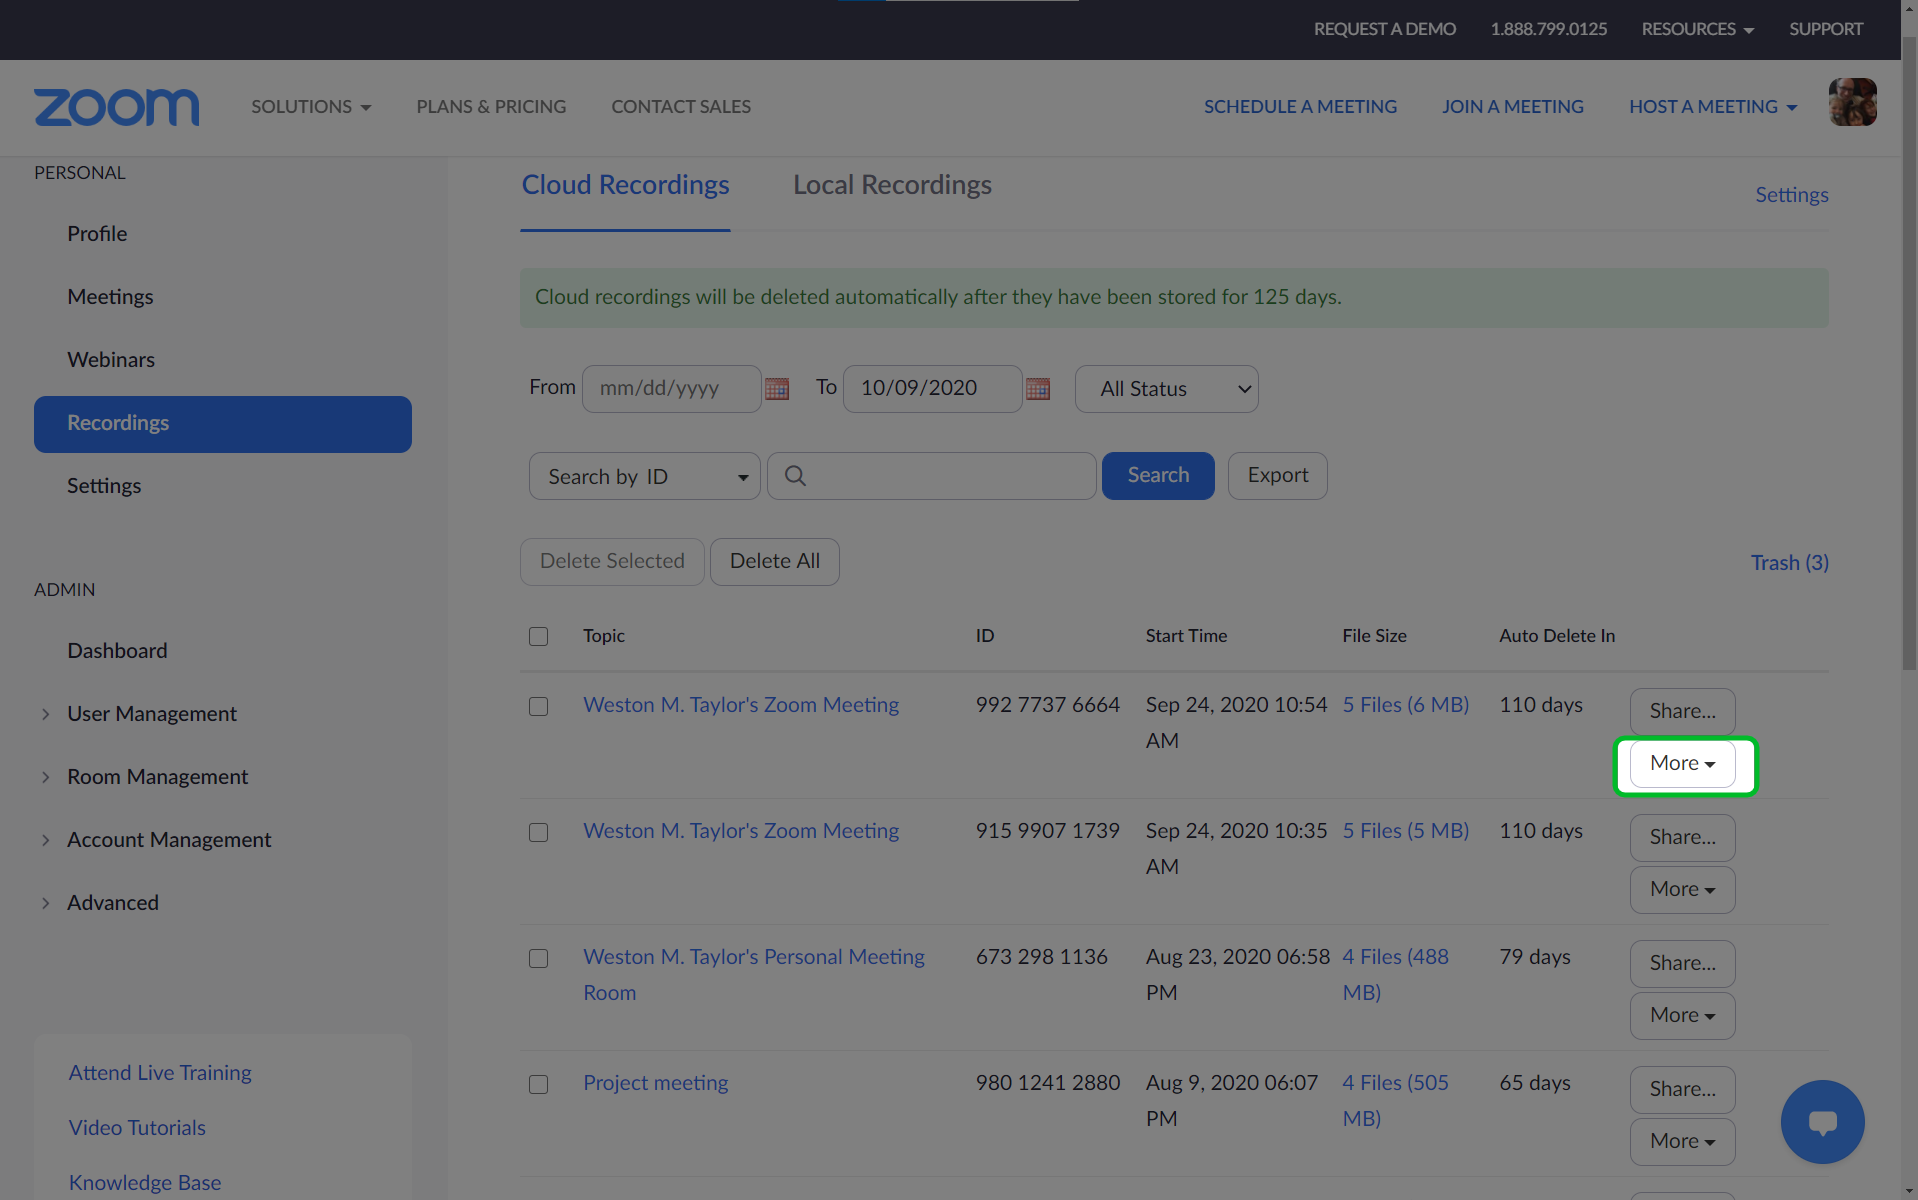
- You can tell how long your Zoom recording will still be in Zoom based on the "Auto Delete In" column next to the "Share..." and "More" buttons.
- Upload your video files to Microsoft Stream (help) or OneDrive - see our videos for Mac and PC to see how to set up your OneDrive.
Source documentation
See documentation for more information:
Report an issue -
Last updated: 01/19/2022