Canvas Assignments
Creating assignment groups in Canvas can make sorting through different course requirements much easier for both you and your students. You can create assignment groups for assignments, quizzes, discussions, readings-the labels are completely customizable and up to you to determine. Another advantage to creating assignment groups in Canvas is that doing so will provide you with the option to use weighted percentages for each group in your grading calculations. However, it is not required that you use the assignments groups feature in Canvas-you can add assignments without grouping them.
Creating Assignment Groups in Canvas
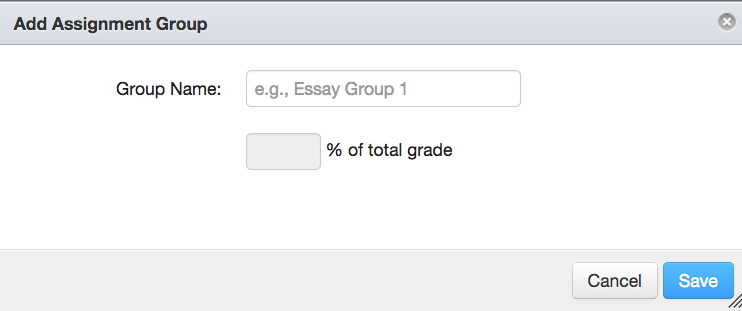
To create an assignment group in your Canvas course, click on the Assignment tab in the menu on the left of the course page. In the new page that opens, click the gray "+Group" button. A lightbox will open prompting you to provide a group name for the assignments and, if you choose to do so, a percentage of the total grade for which the assignment group should count. Note: this field is not required.
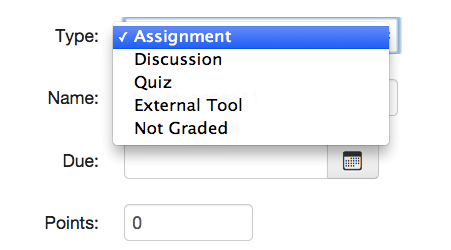
Once you've created an assignment group, it's relatively easy to add assignments of whatever type (quizzes, discussions, or assignments) to the group. Just click the black + sign to the right of the group and choose the type of assignment you'd like to add from the lightbox that opens:
You can also give the assignment a name, set a due date (including time, if you choose to do so), and assign a number of points for the new assignment. Once you've added the assignment, you can click on it in the assignment groups list and click the "edit" button to begin setting up your assignment.
Creating Assignments in Canvas
There are a range of options for configuring assignments in Canvas, including the option to set up the assignment in Canvas and collect paper copies for grading as well as collecting electronic copies and grading them online.
To create an assignment in Canvas, click the Assignment button in the menu on the left of the course page. If you've never set up any assignments, this button may be grayed out, but it is still clickable. At the top right of the page that opens, click the blue "+ Assignment" button.

A new page will open where you can add the assignment name and a description of the assignment as well as any instructions or guidelines for completing the assignment you'd like to provide students. These instructions can be formatted with the rich content editor and can include embedded YouTube videos or images as well as any video or audio recording you've created (either using the media record function inside of Canvas or a different tool outside of Canvas).
![]()
Once you've added the guidelines or instructions for students and formatted them, scroll down to the assignment settings below the text box. Add the number of points the assignment is worth (you can do this even for assignments you'll be collecting on paper if you'd like to keep track of grades in the online gradebook). If you've already set up an assignment group to which the assignment should belong, select that group from the dropdown menu (if you haven't set up those assignment groups, see above). Choose how you'd like to display grades from the dropdown menu labeled "Display Grade as":

Note: the "not graded" option is useful for assignments for which you'd like to schedule due dates in Canvas but will not be recording in the online gradebook.
Next, choose a submission type for the assignment. There are four types from which you can select:
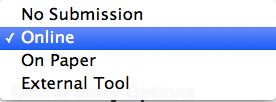
- No submission is an option that will allow you to use the online gradebook without requiring students to submit anything-it's good for things like participation grades or other items that you want to grade without collecting a submission.
- Online submission allows students to submit the assignment online. This submission type includes URL, file upload, and media recording.
- On Paper means that you will be collecting hard copies of the assignment from students but recording the grade for the assignment in the online gradebook.
- External tool allows you to use LTI (Learning Tool Interoperability) technology to use a third-party tool to collect assignments. If you check this option, you'll see a new set of forms appear below:
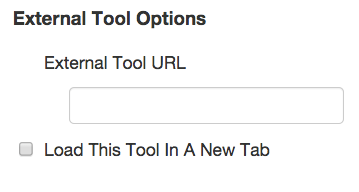
You'll need to enter the URL for the tool you've chosen and then determine whether you'd like to allow the tool to load in a new tab (rather than replacing the course page itself).
If you choose to collect assignments online, a new set of options will appear allowing you to choose to collect the online assignments in a variety of formats: text entry, in which students type the assignment directly into a text editor online; website URL, in which students submit a webpage URL to fulfill the assignment requirements; media recordings, in which students record and upload media (this can be done either inside of Canvas or offline); or file uploads, in which students upload a document or file, usually .docx or PDF, to fulfill their assignment requirements.
For all assignments that are online submission types, you will have the ability to view the assignment in the Speedgrader and provide comments on it in text, video, or audio formats. If you have required students to upload .docx or PDF files, you can use the Crocodoc tools to mark the papers online. Students will receive notifications when you have graded their assignments and can view your comments and annotations on their papers by clicking the "View Feedback" button for the assignment.
If you are using small groups in your course, you can make any assignment you create a group assignment. You can also choose to require peer reviews for assignments submitted online. More information on using the peer review tool is included below.
Finally, you may choose to schedule due dates for the assignments you create. Doing so will provide students with notifications in a variety of places about upcoming assignment deadlines. If you schedule due dates for your assignments as you create them, the dates will automatically appear in the date list on the syllabus, the calendar, the "Coming Up" areas of the dashboard and the course home page, and the list of modules and/or assignments in the course.
Using the Peer Review Tool in Canvas
The peer review tool can be an easy way to allow students to provide feedback on each others' papers. To require peer reviews, simply check the box next to the "Require Peer Reviews" option when you set up the assignment. A new set of options will appear below when you check the box:
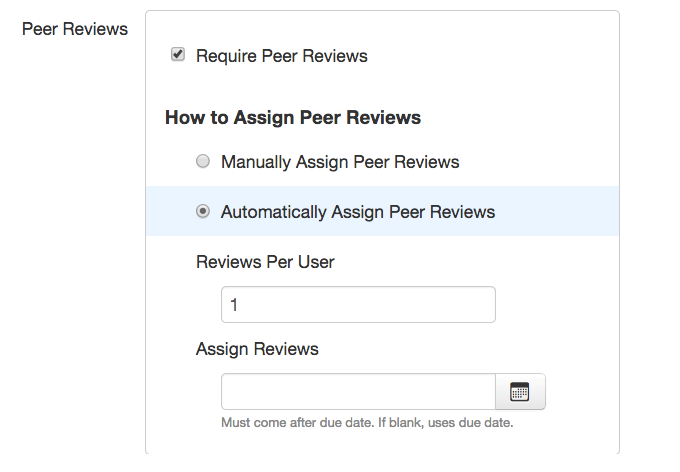
To have Canvas automatically assign each student a specified number of peer reviews to complete, click the button next to "Automatically Assign Peer Reviews." Once that option is selected, a new set of options will appear below prompting you to specify a number of reviews per user and a date on which the peer reviews should be assigned. Note that this date must come after the assignment's due date-that is, the date should come after you expect all students to have made their submissions. This date is what triggers the assignment of the peer reviews, so if you choose a date that is before the assignment due date OR if you do not specify a due date for the overall assignment, the peer reviews will never be assigned.
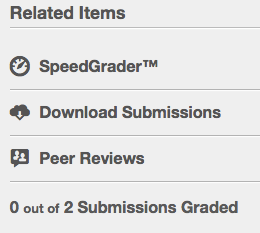
If you choose to manually assign peer reviews, after setting up the assignment and selecting the "Manually Assign Peer Reviews" button, enter your Canvas course after the students have all submitted their assignments, click the Assignment button in the menu on the left of the course page, and then click the appropriate assignment from your list. To the right of the assignment description, you'll see a column labeled "Related Items." If you have set up the assignment to require peer reviews, a button labeled "Peer Reviews" will appear.
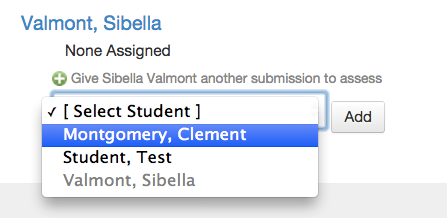
When you click the button, a new page will open showing the list of students. Underneath the list of students, you will see the peer review assigned to that student if you have opted to allow Canvas to automatically assign peer reviews. If you've chosen the manual option, you'll see, under each student's name, a message that says "none assigned" and a green plus sign giving you the option to give each student another submission to assess. (Note that the message will always say "give Student X another submission to assess" even if you've never assigned peer reviews for that assignment.)

To manually assign peer reviews, click the green plus sign. A dropdown menu will appear allowing you to select a student from a list of all students enrolled in the course. The name of the student who is being assigned the peer review will be grayed out and unavailable for selection. Select the student whose work you would like the original student to review, and click add to assign the peer review.
Once the peer review has been assigned, you will see, under the peer reviewer's name, the name of the student whose work will be reviewed with a yellow caution sign. This yellow caution sign means that the peer review has not yet been completed.
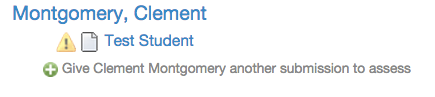
Once the peer review has been completed, the yellow caution sign will change to a green check mark.
Note: even if you've chosen to have Canvas automatically assign peer reviews, you can always check the status of the peer reviews with the method described above-click the "Assignments" button in the course menu, choose the appropriate assignment, and click "Peer Reviews" from the column to the right of the assignment description.